

Adding CSS Animations to Your Squarespace Site - Part 2
In July, I wrote a blog post on implementing Justin Aguilar's CSS Animation Cheat Sheet into your Squarespace site. I am honored and truly humbled by the amount of traffic that article received, and the number of people that took the time to thank me for publishing it via the comments. <3
That tutorial operated by incorporating Justin's CSS Animation library -- a list of readymade animations -- into your Squarespace site and then referencing them at will to animate elements on your Squarespace site. It was the first article of its kind.
Several people asked if there was a way to have access to more animations. Justin's sheet is phenomenal but his animation options are perhaps too playful and bouncy. So, in this article, Part 2, we pioneer together again and I will teach you how to implement an entirely different and significantly larger library of CSS Animations into your Squarespace site, named Animate.css, created by Daniel Eden. You can find Part 1 here.
A Preliminary Note
A quick heads-up before you begin:
- You do not need to know how to code/program to follow this tutorial, although rudimentary knowledge of CSS will be helpful
- You need to use Google Chrome Browser on a Mac, PC, or Chromebook
- This method implements Daniel Eden's Animate.css library into your site, As a result, the CSS Animations you will have available will be limited to those in his library.
- This tutorial depends on a pre-written list of animations. It is up to you whether or not you feel the finished effect of implementing these animations onto your site is professional or conducive to your brand.
- I developed this tutorial on the Bedford theme. It *should* work on other themes, but I have not tested this.
Understanding How Your Site's Animations Will Work
Your Squarespace site's CSS Animations will work as follows:
- Daniel Eden's Animate.css Library will be incorporated into the code of your site.
- You will be able to assign an animation from the library to ANY block on your site, whether it be an image block, text block, etc.
- Your animations will be triggered upon a scroll event -- meaning, when your visitors scroll down to a certain point in your website, the animation will be triggered a single time, and then the animated block will fill a fixed position.
Upgrading Daniel Eden's Animate.css
When I approached implementing Daniel's Animate.css sheet into Squarespace, I ran into a problem. The element I wished to animate was visible for a moment before the animation event. This looked really unprofessional. This never was an issue in the previous tutorial, so why did it occur with Daniel's sheet? Long, boring, techy explanation saved -- he actually didn't include several key lines of code that Justin Aguilar did include in his sheet, so I didn't encounter the glitch with Justin's sheet.
Determined to find a solution, I spent several hours reconciling the differences in Justin's code and Daniel's. The practical result of this effort is what I call UpgradedAnimate.css. I have created a modified version of Daniel Eden's sheet that perfects the animation for Squarespace sites (and probably other sites). Out of respect to Daniel, however, I still very much consider the document we are working with here to be his creative work. I merely added to it to modify it for my aesthetic preferences. So, an important thing to note is: while I have provided links to Daniel's site, the style sheet he provides for you to download is NOT the same style sheet that I work with in this tutorial. For your convenience, I provide a link to download my UpgradedAnimate.css document.
Let's Begin
Step 1: Download the Animate.css Library
First, you need to download Daniel's Animate.css library to your computer. For your convenience, I have already downloaded his .css file and attached it to the button below. All you need to do is click on it and save the file to your computer. Now, to provide credit only, you can find Daniel's Animate.css page here. However, we are NOT using that sheet in this tutorial. Instead, we will use the modified version of his library that I created, called UpgradedAnimate.css. Click on the button below to download it so we can get started!
Step 2: Upload The Animation Library To Squarespace
In order to use the animation library we just downloaded within your Squarespace site, you need to upload it to your site's file storage -- included with your Squarespace plan. You most likely have not interacted with this storage space, as Squarespace does not really encourage its use. If you want to read more about their thoughts behind this see this support article.
In order to upload a file to your Squarespace site, you have to create a text box (or use text from an existing text box) and create a hyperlink for that text. So, you're sub-steps for this part are:

- Create or use an existing text box
- Add a hyperlink to a word or some text within that text box using the dark grey, horizontal text editor bar
- This generates the hyperlink window, which gives you the choice of linking your text either Content, Files, or External
Once the hyperlink options window is open, click on FILES. Then, click on ADD A FILE. Upload the animation library file, which is called "upgradedanimate.css".
At this point, the animation library is successfully uploaded into your Squarespace file storage. DO NOT unlink or delete your hyperlinked text right now. We need it still for Step 3.
Step 3: Determine The HTML Link To Your Library On Your Site
Now that you have uploaded the animation library CSS file to your Squarespace site, that file has a specific and unique HTML link to where it is hosted within your site. You need to get this link for a later step. The purpose of uploading the file to your site's storage and then getting your localized HTML link is to always maintain control of hosting the animation library... meaning, if Daniel Eden shuts down his site for some reason, your animations will continue working because the style sheet he made is now hosted on your own domain!
In order to obtain your file's link, you need to hover over your hyperlinked text from Step 2. Then, CLICK once on the hyperlinked text. That will generate a small window above the hyperlinked text offering you to remove or edit the link. In the left side of that small window is a part of your file's HTML link. See the picture below. I am referring to "/s/upgradedanimate.css"

Now, that "/s/upgradedanimate.css" is only PART of your file's full HTML link. The rest, to be filled in on the left, is your Squarespace editing domain that Squarespace gives you when you are in the editor -- usually based on your name. You can find this in your address bar whenever you are editing your Squarespace. For example, if your name is John Snow and you are editing your Squarespace site right now, your address bar will read something to the effect of "https://john-snow.squarespace.com/................"
Your file's FULL HTML link is the "https://name-name.squarespace.com...." bit PLUS the /s/upgradedanimate.css bit. So, something like:
https://john-snow.squarespace.com/s/upgradedanimate.css
Step 4: Header Code Injection
In order to make your CSS animations work on your site, you will have to add custom code (which I will provide you with) in three places on your site. This is the first.
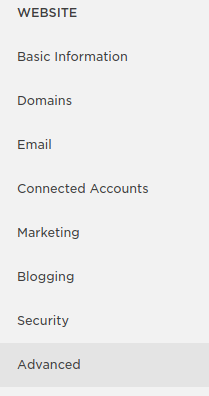
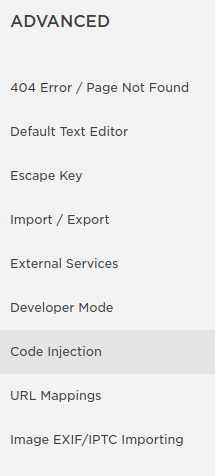
From the main Squarespace menu, CLICK on Settings --> Advanced (under Website) --> Code Injection.
This will take you to where you need to be.
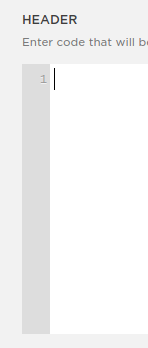

Inside the Header Code Injection section, you need to insert the following text: ***Note: this is a slightly different snippet than in my other tutorial so please use this one for this tutorial. They are NOT interchangeable.
<script src="https://code.jquery.com/jquery-2.1.3.min.js"></script>

<link rel="stylesheet" href="https://john-snow.squarespace.com/s/upgradedanimate.css">
*** Now, obviously replace the file link (which I italicized) with your file's specific HTML link, which you found in step 3.
Save/leave the Header Code Injection menu. You can also delete the hyperlinked text that we created in an earlier step. The css file will still be saved.
Step 5: Determine The Unique ID Of The Block You Wish To Animate
Every block within your Squarespace site has a unique ID. In order to animate a specific picture or text block instead of EVERY picture or text block, you need to reference the animated block's unique ID in the code we are about to add. The easiest way I have found to discover the ID of each block on your site is to use this Chrome extension. As I said at the beginning of the tutorial, you need to be running Google Chrome browser for this to work. Add the Chrome extension to your browser.

Once it is added to Chrome, close down all of your Chrome tabs then reopen them. A black and white icon with a B should now be in the upper right hand corner of your Chrome browser window.
Still in the Squarespace editor, navigate to the page in which the block you want to animate is located. Once there, click on the B logo from the extension. This will cause the block IDs for all your blocks on that page to become visible.

Click on the ID of the block you want to animate, and it will be copied to your clipboard. Click on the B logo again to make the IDs go away.
Step 6: Add A Code Block

In this step, we will be adding a Code Block dedicated to commanding a single block to animate as you desire. You can put this block whereever you want on your page -- it is invisible except when EDITING a page. You could put it underneath the element you wish to animate for simplicity. Personally, I like to keep them at the bottom of the page, although if you are animating multiple blocks this could become a little bit confusing.
Within the code block, SET THE LANGUAGE TO HTML and paste the following code: ***Note: Again, this code is different than in my other tutorial, they are not interchangeable.
<div id="#block-yui_3_17_2_6_1459644649106_53673" class="animated lightSpeedIn">
 <script>
 $(window).scroll(function () {
 $('#block-yui_3_17_2_6_1459644649106_53673').each(function () {
 var topOfWindow = $(window).scrollTop(),
 bottomOfWindow = topOfWindow + $(window).height();

 var imagePos = $(this).offset().top;

 if(imagePos <= bottomOfWindow-250 && imagePos >= topOfWindow+250){
 $(this).addClass('animated lightSpeedIn');
 }
 //else{
 //$(this).removeClass('animated lightSpeedIn');
 //}
 });
 });
 </script>

Again, REPLACE my block ID's in that code block (it occurs in two places, and I have italicized them) with YOUR block's ID.
KEEP the quotation marks as they are. Just REPLACE my block ID with yours.
Modified Code Block Code That Will Make The Animation Happen ONLY Once, Instead Of Repeat Constantly Upon Scrolling Over The Animated Block Again:
<div id="#block-yui_3_17_2_6_1459644649106_53673" class="animated lightSpeedIn">
<script>
$(window).scroll(function () {
$('#block-yui_3_17_2_6_1459644649106_53673').each(function () {
var topOfWindow = $(window).scrollTop(),
bottomOfWindow = topOfWindow + $(window).height();
var imagePos = $(this).offset().top;
if(imagePos <= bottomOfWindow-250 && imagePos >= topOfWindow+250){
$(this).addClass('animated lightSpeedIn');
}
//else{
//$(this).removeClass('animated lightSpeedIn');
//}
});
});
</script>Also, Note That You Can CHANGE WHEN THE ANIMATION HAPPENS By Changing The "BottomofWindow" And "TopofWindow" Values From 250 To Whatever You Wish.
Someone in the comments asked if could make the animation work upon page load, not scroll... to do this, just set the values that are currently "250" low enough that this happens as soon as the page loads because the window positions will be fulfilled. Note this will only work for animated elements within the initial loading window (aka the top of your web page) on most laptop/desktop screens. For animated elements below this point, if you animate them when the page loads, your viewers will not see the animations because they weren't on that section of the page yet. The nice thing, however, is that you can adjust those triggering pixel ranges (currently both 250 in my code) for each individual animated element.
**Quick Note on Syntax: You MUST include the animation in the format: "animated + {space} + animationname", so for example, "animated slideIn"
Step 7: Program The Scroll Event
If you have correctly followed these steps until now, you block should be animated, however it appears briefly in a fixed position, then animates. This looks bad. To fix this, we have to add a third bit of custom code. This code will make your block hidden temporarily until the scroll event happens.
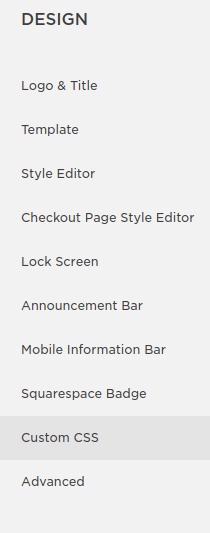
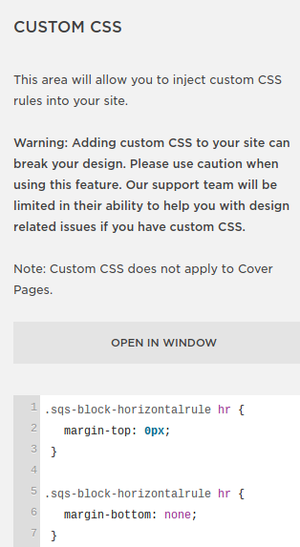
In the main Squarespace menu, go to Design --> Custom CSS.
In Custom CSS, paste the following code:
#block-yui_3_17_2_6_1459644649106_53673{
    background-color: rgba(0, 0, 0, 0);
    visibility: hidden;
}
As always, REPLACE my block ID (italicized) with yours. Also, the background color #ffffff is solid white. If your background is a different color, be sure to replace that also with the #colorcode of your background.
Step 7: Enjoy And Customize
That's it! At this point, if you have followed this tutorial successfully, your block should be animated! As you move forward and dig deeper into your newfound ability, I will leave you with some notes.
To change the animation that your element is animated with, simply reference a different animation in the CODE BLOCK (that's the only spot you have to change anything) in all three places that the animation is referenced. I believe that in this tutorial I used "animated lightSpeedIn", so just change that to "animated [name of the animation you want]". You can find all of your options both inside of the CSS sheet if you download it and open it with a text editor, or on Daniel's page: Animate.css. If you click on the drop down box there where "bounce" is written, you can see a list of all the animations in the library. Note: these animation references are case-sensitive, so if the animation is named "fadeOutUp", you need to write it exactly like that.

- Remember that, to animate additional blocks, you will need to create additional CODE blocks and then repeat Steps 5 & 6. You will also need to add another Custom CSS entry (Step 6). Remember to insert the unique block ID of the new block you wish to animate into the new CODE block and Custom CSS entry.
- You can program your block to use any of the CSS animations, just change the name in your code block... make sure to change the name in each place that it occurs.
That's all I've got! I really hope this was helpful, and if you want to check out my first tutorial which implemented Justin Aguilar's library, check out Part 1 here.
---
Patrizio Murdocca is Chief Web Architect at Drover Rideshare, a student at Vanderbilt University, and supports Interfaced Ministries.
